Workaround to This System Does Not Support Full Screen Mode in Windows 8 / 7 / Vista
Unlike Windows XP, beginning from Windows Vista, Windows OS takes away a lot of support and convenience for the sheer attractive of flashy user interface. One major feature is the ability of open full screen window for Command Prompt shell by pressing Alt + Enter keys in Windows Vista, Windows 7, Windows 8, and Windows 8.1 (the ability to open full screen Command Prompt makes a comeback in Windows 10). When you attempt open or run DOS .com applications, .bat batch scripts or games that relies on Command Prompt, and including cmd.exe itself, you will encounter the following error message:
This system does not support fullscreen mode. Choose “Close” to terminate the application.
The lack of support for full screen DOS Command Prompt in Windows Vista, Windows 7, Windows 8 and Windows 8.1 is a big annoyance especially for those who still playing games for DOS and Windows 3.1/9x era, use legacy software such as WPDOS or programmers who frequently switch to command prompt to use DOS based programming language such as PASCAL. It happens because in these OSes, the Windows Display Driver Model (WDDM) based device driver for the graphics card does not support the running of DOS video modes.
There is no simple solution to this no support for full screen window in Windows Vista, Windows 7, Windows 8 and Windows 8.1. In almost all possible workarounds, you are almost guaranteed that your Windows Vista, Windows 7, Windows 8 and Windows 8.1 will be broken in some way, at least on the part on Windows Aero. You will lose the nice Aero Glass interface if you attempt any of these trick, plus other unknown side effects.
Workaround to Run or Open Full Screen Window Mode
Workaround 1: Use XDDM driver instead of WDDM driver for video graphics adapter
In another word, install the Windows XP video card driver for use in Windows Vista, Windows 7, Windows 8 and Windows 8.1. If the video graphics card hardware supports Windows XP driver, you can download the Windows XP driver for your video hardware and install it under the Windows. However, be warned that using XP driver on display adapter may crash your Windows system randomly, so save your works before proceeding and use with care.
Note: This solution has been recommended by Microsoft in KB926657.
To install a Windows XP video driver under Vista, just follow the procedure listed in the guide below. The steps should work for both NVIDIA and AMD ATI video graphics accelerator card.
Download the Windows XP driver installer for your graphics card from NVIDIA or AMD / ATI.
Run the installation setup program just downloaded. Confirm any User Account Control permission warning when prompted.
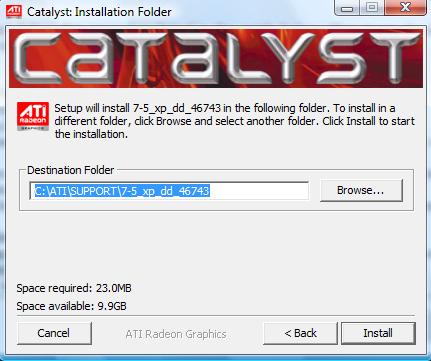
The installer will first extract and unpack the files required by installation to proceed to a folder/directory. Note down the path to the folder. For AMD ATI, the folder for these installation files usually located in a directory with a name that resembles C:\ATI\SUPPORT\7-5_xp_dd_46743\Driver or C:\ATI\SUPPORT\7-5_xp_dd_ccc_wdm_46743\Driver or C:\AMD\AMD-Catalyst-15.7.1-WinXP-32bit, with the only different been the number to indicate the version and build number of the driver.
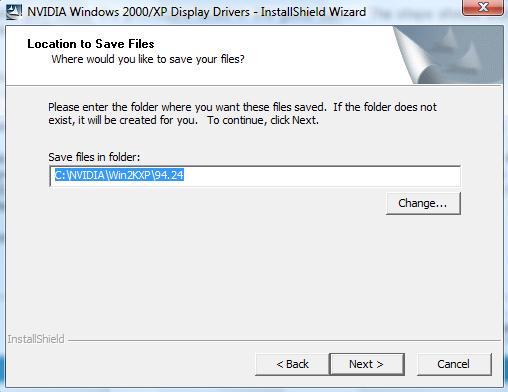
Similarly, NVIDA driver pack will also unpack itself to a extraction folder, normally named according to the structure of C:\NVIDIA\Win2KXP\94.24 or some similar number.
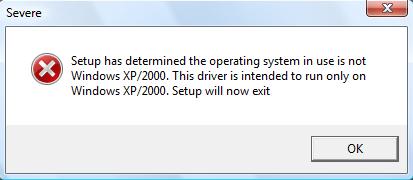
You must proceed pass the above screen in order for the extraction of installation files to take place. Don’t worry about clicking on “Next” button, as the installer will prompt a critical stop error message somewhere in the process because the setup detected that the operating system in use is not Windows 2000 or Windows XP. The setup program and its associated drivers are designed to run only on Windows 2000 or Windows XP. The installation will be terminated.
Cancel the driver installation when the error message is prompted. Actually once you click on OK button you will exit automatically.
Using Windows Explorer, navigate to the directory that contains the unpacked installer files.
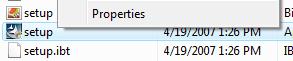
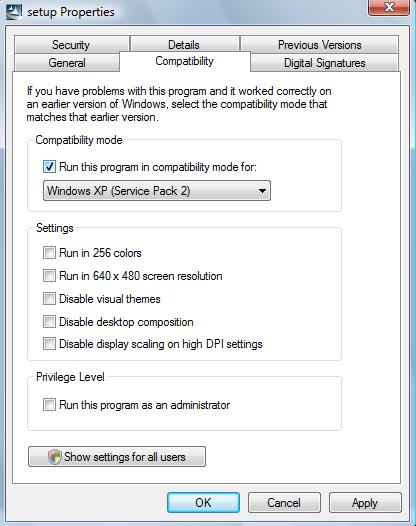
Right click on Setup.exe file, and choose Properties item from the right click contextual menu.
Select Compatibility Mode tab. Tick the checkbox next to Run this program in compatibility mode and choose Windows XP Service Pack 2 from the dropdown menu. Click OK when done.
Double-click on Setup.exe to run the installer, and install the Windows XP driver in newer version of Windows.
Reboot the system, and you should be able to open or run program and command prompt in full-screen mode.
Workaround 2: Use Standard VGA Graphics Adapter video graphics driver
Similar with method 1, but use Windows Vista, Windows 7, Windows 8 or Windows 8.1’s built-in Standard VGA Graphics Adapter driver, which offers greater stability and compatibility, but a lot less functionality and features support. The following steps guide you on how to install the Standard VGA Graphics Adapter.
Right-click on the Windows desktop and then choose Personalize from the pop up contextual menu.
Click on Display Settings link from the Personalization dialog window.
On the Monitor tab of Display Settings window, click on Advanced Settings… button.
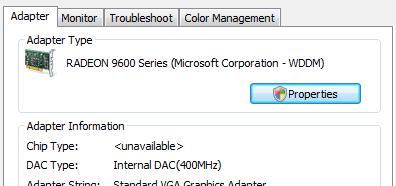
If you’re not already on the Adapter tab, click on Adapter tab to activate it. Then click on the Properties button under the Adapter Type section. Allow UAC permission request.
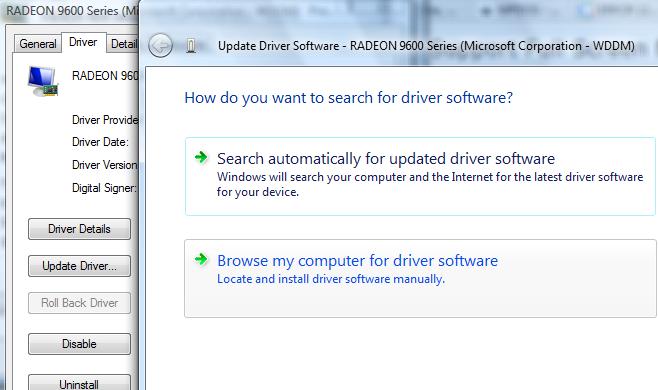
On the Display Adapter Properties window, click on Driver tab.
Click on Update Driver… button. Then select Browse My Computer for Driver Software option.
Click on Let me pick from a list of device drivers on my computer option.
Select and highlight Standard VGA Graphics Adapter from the list when prompted to select a device driver you want to install for this hardware, then click on Next.
Windows will install the new standard VGA video driver to replace the original driver for your graphics accelerator. If your monitor goes blank (no signal), wait five minutes, then power down your computer and restart it normally. If your monitor does not go blank, wait while the driver is installed.
Click on Close or OK button on all dialog boxes repetitively until you’re back to the desktop or your computer restarted.
Restart your computer if you’re not prompted and have not already done so.
Once computer rebooted, you should be able to open programs or command prompt shell in full screen window. You may need to set the resolution again, as everything related to display settings is likely to be reset.
If you want to reverse this procedure and install back the video display card’s manufacturer driver, follow the same instructions again, but choose the option to let Windows automatically install the appropriate software for your system instead of browsing your computer for driver software. If you unable to do so by clicking on Properties button on Adapter tab, go to Device Manager and directly select Update Driver Software on right click context menu.
Workaround 3 – Using DOSBox
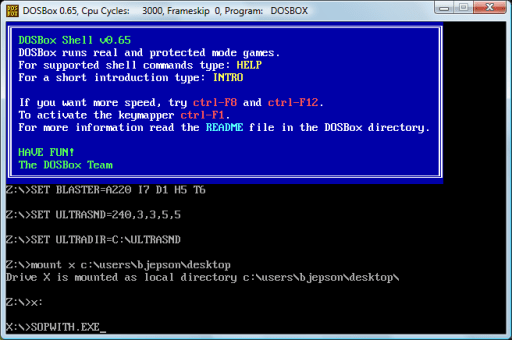
DOSBox is a Intel x86 and DOS emulator for Windows. The open source DOSBox application runs up a shell window which emulates a DOS environment complete with sound, graphics, mouse, modem, etc., and allows legacy DOS apps and games to be ran and play on it. DOSBox handles all requests between Windows and the DOS window, memory allocation, control CPU speed, and allow tweaking of sound card emulation, graphics type, key mapping, mouse sensitivity, resolution, full screen mode and etc.
Although DOSBox cannot add Windows features to DOS programs that are run on DOS systems, and some features of DOS in native mode are not present, but its usefulness is still great in allowing almost all currently-available 32-bit versions of Microsoft Windows – Windows 95, 95b, 98, 98SE, ME, NT4, XP, 2000, 2003, Vista and 2008 to run legacy apps and games.
Some tweaks and configuration have to be done in order to get DOSBox running to play your games or launch your old application software. Basic Setup and Installation of DosBox wiki provides a guide on how to use the DOSBox. As DOSBox emulates DOS, you will have to deal with lots of command line syntaxes in command shell. If you’re not familiar with command prompt, there are a few GUI frontend interface for DOSBox, which presents all settings in typical Windows interface, and allows users to attach different profiles with different configuration optimal for different DOS games or programs. Such front ends include D-Fend (no longer available), D.O.G. (no longer available) and DBGL: DOSBox Game Launcher
Note that while using DOSBox, it’s best to disable User Account Control to get the best performance and so that DOSBox can properly emulates sound, VGA color and CPU speed. During the DOS era there is simply not such thing as functionality restriction based on user account and user level, thus any limitation may cause problem to emulated apps.
Another issue is Windows Sticky Keys, an accessibility features for physically-handicapped users. Sticky Keys are activated by pressing a particular sequence or combination of keys which a normal user seldom and unlikely stumble across, such as pressing Shift key 5 times continuously. But these sequence of key pressing may be needed during DOS gameplay. Worse is that DOSBox doesn’t handle this properly and it doesn’t partition keyboard or mouse activity away from the host OS. So you properly need to disable Sticky Keys permanently so that it won’t suddenly appear and disrupt game play.
Again, using DosBOX and/or its front-end GUI may also caused some apps or games to suffer from abnormal behavior such as system randomly crashes or refuses to run altogether.
LK is a technology writer for Tech Journey with background of system and network administrator. He has be documenting his experiences in digital and technology world for over 15 years.Connect with LK through Tech Journey on Facebook, Twitter or Google+.