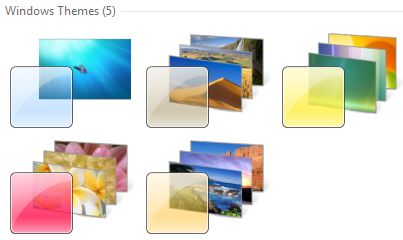
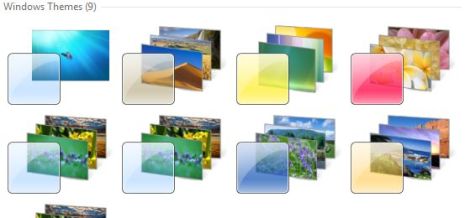
If you feel that the themes (by default has 4 or 5 different themes included on installation) is not enough for personalization, Windows 7 (from build 6956 onwards, including build 7000) has hidden themes that can be unlocked, and applied as the theme for Windows 7 system. These locked hidden themes is actually meant for some regional countries such as Australia, Canada, Great Britain, United States and South Africa.

Original number of themes included in Windows 7
To unlock and reveal the hidden regional themes in Windows 7, do the following:
- Open Windows Explorer.
- Click Organize, and select Folder and Search Options.
- Go to View tab.
- Select Show hidden files, folders and drivers and uncheck Hide protected operating system files (Recommended). If prompted with confirmation, click Yes.
- Click OK.
- Browse to the following folder:
\Windows\Globalization\MCT\
- There are five folders in the name with format MCT-XX (where XX is AU, CA, GB, US, or ZA) which represents globalization settings for each region. Go into the folder that you want to activate its theme.
Note: AU, CA and ZA regions have the same themes.
- Open the Theme folder inside the selected region folder.
- Double click on the XX.theme file to apply the theme to the Windows 7 desktop system. Once a theme is ran and activated, the theme will be remembered and saved into Personalization options, so that user can change or select the theme again directly from Personalization settings screen.
- Now to go to Folder Options to reverse the first 5 steps to hide the hidden and protected system files and folders again.

After unlocking, there are more themes for personalize selection.
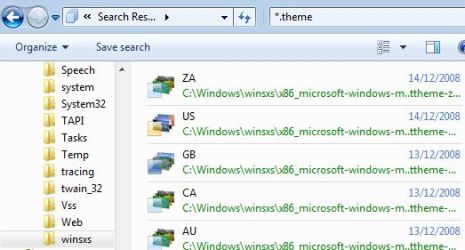
Alternatively, go to \Windows\winsxs, and search for *.theme. Double click on the first 5 themes with name in the format of XX as listed above to apply and save the theme. The rest of the themes returned in search results are already included in the system.

Recent Posts
- Able2Extract Professional 11 Review – A Powerful PDF Tool
- How to Install Windows 10 & Windows 8.1 with Local Account (Bypass Microsoft Account Sign In)
- How to Upgrade CentOS/Red Hat/Fedora Linux Kernel (cPanel WHM)
- How to Install Popcorn Time Movies & TV Shows Streaming App on iOS (iPhone & iPad) With No Jailbreak
- Stream & Watch Free Torrent Movies & TV Series on iOS with Movie Box (No Jailbreak)
 Tip and Trick
- How To Download HBO Shows On iPhone, iPad Through Apple TV App
- Windows 10 Insider Preview Build 19025 (20H1) for PC Official Available for Insiders in Fast Ring – Here’s What’s News, Fixes, and Enhancement Changelog
- Kaspersky Total Security 2020 Free Download With License Serial Key
- Steganos Privacy Suite 19 Free Download With Genuine License Key
- Zemana AntiMalware Premium Free Download For Limited Time