Install or Enable Snipping Tool in Windows 7 & Vista
Beginning from Windows Vista and Windows Server 2008, all Windows and Windows Server operating system comes built-in with a free screen capture or screenshot utility named Snipping Tool. Snipping Tool is available as a standard feature in Windows Vista Home Premium, Business, Enterprise, Ultimate edition, and all editions for later Windows versions such as Windows 7, Windows 8, Windows 8.1, Windows 10 and etc. It should be installed by default by each supported Windows edition installation as standard feature, and can be found under Accessories or Windows Accessories folder. However, for some reason, some Windows system does not load this useful screen shot feature, but you can always install or enable this feature manually.
Snipping Tool actually has available for Windows XP Tablet PC Edition 2005 since a while ago. Thus, Microsoft is kind of porting the Snipping Tool from Tablet PC to Windows for desktop and notebook usage. Hence, do not surprise when the guide asks you to enable Tablet-PC Optional Components later.
Snipping Tool is integrated natively with Windows since Windows 8, Windows 8.1, Windows 10 and later. In these operating system, just search for Snipping Tool in order to start using it.
Here’s how you can reveal the Snipping Tool in Windows, if it’s not yet enabled in your system:
Click on the Start button, and go to Control Panel.
Click on Programs link.
Click on Turn Windows features on or off link. If User Account Control pops up for confirmation, click on Continue button.
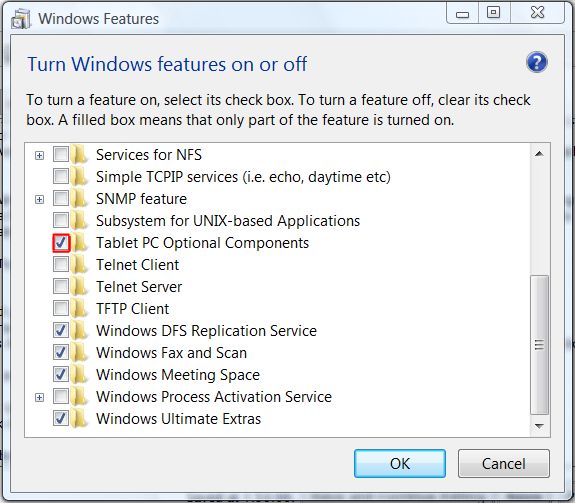
Scroll down the list of features in Windows Features dialog window, tick the check box for Tablet-PC Optional Components to enable and show the Snipping Tool in Vista.
LK is a technology writer for Tech Journey with background of system and network administrator. He has be documenting his experiences in digital and technology world for over 15 years.Connect with LK through Tech Journey on Facebook, Twitter or Google+.