Before installing a Service Pack, such as SP1, SP2 and so on, into Windows 7 and Windows Server 2008 R2, Windows will create a restore point and backup all system files necessary to restore operating system to previous condition just in case users want to uninstall the SP or encounter errors and issues with SP installed.
If you have successfully installed SP, and does not face any issue, problem or error, and determined that you do not want to uninstall the Service Pack in future, and want to make the SP installation permanent, it’s possible to clean up and remove the backup files created during installation of the Service Pack to reclaim disk space of as much as 1 to 3 GB.
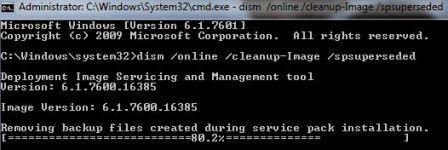
To delete and remove backup files created during Service Pack installation, just open an elevated Command Prompt window with elevated permissions, and run the following command:
dism /online /cleanup-image /spsuperseded

The command, when executed, will remove the backup files that is required to uninstall service pack to free up disk space. As such, it’s impossible to remove the SP after running the command.
An alternative method to clean up and remove the backup files is by using Disk Cleanup. Type “Disk Cleanup” into Start Search and hit Enter, then select the system drive where Windows is installed. Wait for Disk Cleanup to process the drive and calculate the free disk space that can be reclaimed, and then select (tick) the “Service Pack Backup Files” option. Click “OK” to let Disk Cleanup remove and delete the backup files of SP.

If the Service Pack Backup Files item still exist after SP1 backup files are removed, here’s how to remove and delete the Service Pack Backup Files item on Disk Cleanup.
Recent Posts
- Able2Extract Professional 11 Review – A Powerful PDF Tool
- How to Install Windows 10 & Windows 8.1 with Local Account (Bypass Microsoft Account Sign In)
- How to Upgrade CentOS/Red Hat/Fedora Linux Kernel (cPanel WHM)
- How to Install Popcorn Time Movies & TV Shows Streaming App on iOS (iPhone & iPad) With No Jailbreak
- Stream & Watch Free Torrent Movies & TV Series on iOS with Movie Box (No Jailbreak)
 Tip and Trick
- How To Download HBO Shows On iPhone, iPad Through Apple TV App
- Windows 10 Insider Preview Build 19025 (20H1) for PC Official Available for Insiders in Fast Ring – Here’s What’s News, Fixes, and Enhancement Changelog
- Kaspersky Total Security 2020 Free Download With License Serial Key
- Steganos Privacy Suite 19 Free Download With Genuine License Key
- Zemana AntiMalware Premium Free Download For Limited Time