Disable and Turn Off Windows 10 / 8.1 / 8 / 7 Search Indexer and Indexing Service
Beginning from Windows Vista, modern Windows operating systems has greatly enhanced its search algorithm where the search process is now not only faster, but users can also easily search for almost all kind of files, documents, pictures, videos, emails and contacts in Microsoft Outlook, and even commands or application programs’ executable. To achieve the fast searching speed, indexing service plays a pivotal role. Windows Vista, Windows 7, Windows 8, Windows 8.1, Windows 10 and so on starts to crawl and index files on hard disks right after installed with a low priority background process. If you notice that your hard drive activity LED light is constantly flashing even if computer is idle, this is probably due to indexer at work.
This is supposedly the case – indexing at system idle period in order to minimize the performance penalty affected on normal usage. However, this may not be the case in all systems, as the search indexing related processes such as SearchProtocolHost, SearchFilterHost and SearchIndexer actively running even though computer is processing other more critical tasks or running important applications, effectively slow down overall computer performance by sucking up important CPU, memory and other system resources.
So to speed up the Windows system, users may want to turn off and disable the search indexer and indexing service. You can and should also disable the indexing of files if you’re using other desktop search utility such as Google Desktop Search and etc. If you don’t mind the slower searching speed when performing searches, the indexing has no meaningful use to you too. There are several ways to do this, as listed at the guide below.
Disable Windows Search Service
This method effectively stop and disable all search indexing processes, and is the recommended way.
Click on Start button, then select Control Panel -> System and Maintenance or System and Security -> Administrative Tools, and double click on Services applet.
Alternatively, simply type Services in Start Search box.
Grant User Account Control permission to Continue if prompted.
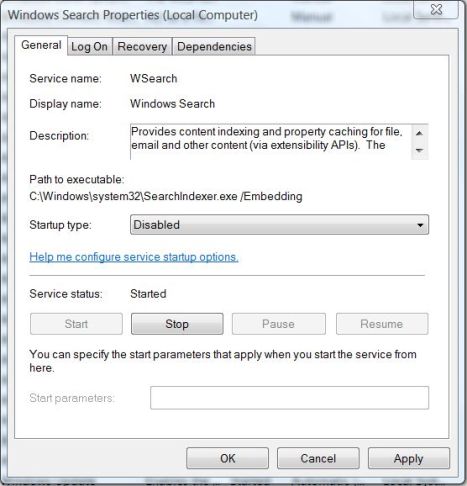
Locate an service named Windows Search.
Right click on Windows Search, and then select Properties on contextual menu.
Click on Stop button to stop the indexing service immediately.
On the Startup Type dropdown box, select Disabled.
Click on OK button.
To re-enable the Windows Search, simply change back the “Startup Type” to its original setting, i.e. Automatic or Automatic (Delayed Start).
Disable Indexing on Drives
This method allows users to selectively disable indexing on certain drives which rarely used or searched. However, it may take a long time to apply new attributes to all files, folders and sub-folders to exclude them from indexing.
Open Windows Explorer or File Explorer (normally from Accessories, Windows Accessories or Windows System folder of Start menu).
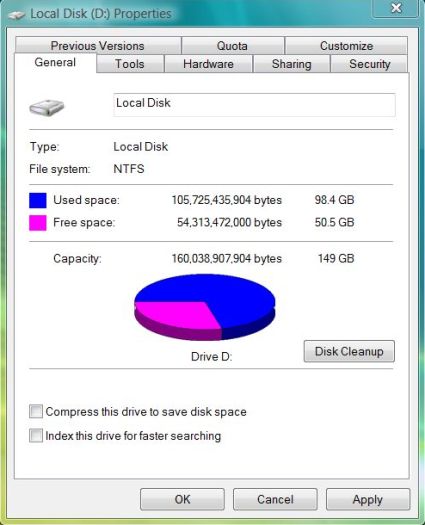
Right click on the drive (or drive letter) that you want to turn off the indexing.
Select Properties on the contextual menu.
Unselect (untick) the Index this drive for faster searching or Allow files on this drive to have contents indexed in addition to file properties option.
Click Apply or OK button.
To re-include the drive, simply select the option again.
Indexing Options Remove or Exclude Indexed Locations in Control Panel
This method does not turn off indexing service. Instead, it just excludes deselected folders from search index, or deselect folders from included list. The indexer processes may still run after you remove or exclude everything.
Click on Start button, then select Control Panel -> System and Maintenance, and hit Indexing Options.
In Windows 10 or equivalent OS which you can’t find the option, search for Indexing Options instead.
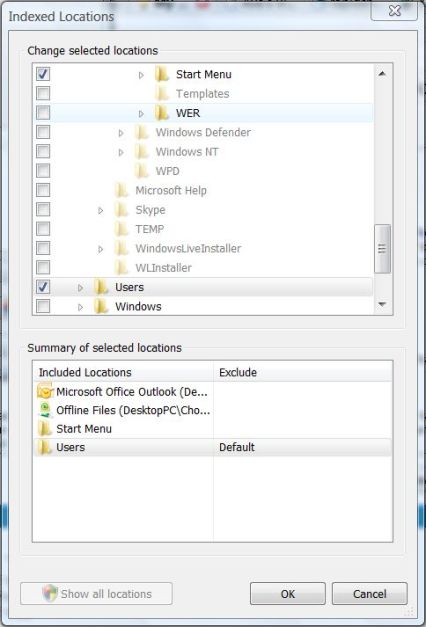
To remove an Included Location, simply click on Modify button, and then untick the checkbox for respective folders under the “Change selected locations” box.
To remove indexing on Start Menu and/or Users folder, click or tap on the item once at “Summary of selected locations” box, which will lead you directly to the location for selection or deselection.
LK is a technology writer for Tech Journey with background of system and network administrator. He has be documenting his experiences in digital and technology world for over 15 years.Connect with LK through Tech Journey on Facebook, Twitter or Google+.

 Non Stop Blinking Issues")


